Featured Articles
Lazyboy Power or Manual Recliner? Full Comparison
Choosing between a Lazyboy power recliner and a manual recliner is one of the biggest decisions you will make before buying a new chair. At first glance, both options may look similar. They can share the same general shape, plush cushioning, supportive back, and relaxing reclined position. But the way they function in everyday use can feel very different.
For some people, a manual recliner is the perfect choice because it is simple, reliable, and often more affordable. For others, a power recliner is worth the extra cost because it offers easier adjustment, better precision, and added convenience. The best option depends on your budget, body needs, comfort preferences, room setup, and how you actually use your recliner every day.
This guide breaks down the full comparison between Lazyboy power and manual recliners so you can decide which one is better for your home. We will cover comfort, ease of use, durability, repairs, price, features, room planning, maintenance, and who each type is best for.
What Is a Manual Lazyboy Recliner?
A manual Lazyboy recliner is operated by body pressure, a side handle, or a pull lever depending on the model. To recline, you usually pull the handle or release mechanism and lean back using your own body weight. To close the footrest, you generally push it back down with your legs and body movement.
Manual recliners are popular because they are straightforward and do not require electricity. They are often chosen by buyers who want a classic recliner feel with fewer electronic components.
If you are new to the category, it may help to also read about the broader benefits of Lazyboy recliner ownership before narrowing down the power versus manual decision.
What Is a Power Lazyboy Recliner?
A power Lazyboy recliner uses an electric motor to move the chair into different positions. Instead of pushing back manually, you use built-in buttons or controls to raise the footrest, recline the back, and sometimes adjust the headrest or lumbar support depending on the model.
Power recliners are designed for ease, convenience, and more precise positioning. Many users like them because they can stop the recliner at many different angles instead of being limited to a more basic manual range.
Some power recliners also include added features such as USB charging, power headrests, power lumbar adjustment, or lift assistance on certain mobility-focused models.
Quick Summary: Power vs Manual Lazyboy Recliner
| Feature | Power Recliner | Manual Recliner |
|---|---|---|
| Operation | Motorized buttons or controls | Handle, lever, or body pressure |
| Ease of use | Very easy, especially for limited mobility | Simple, but needs physical effort |
| Position control | More precise reclining angles | More limited position control |
| Needs electricity | Yes | No |
| Price | Usually higher | Usually lower |
| Repairs | Can involve motors, switches, transformers | Often simpler mechanical repairs |
| Best for | Convenience, comfort control, mobility needs | Simplicity, budget, traditional use |
Comfort Comparison
Power recliner comfort advantages
A power recliner usually gives you more control over your comfort because you can stop the chair at many points instead of being limited to a few basic positions. This can make a big difference if you like fine adjustments while reading, watching TV, or resting. Some people do not want to be fully upright or fully reclined. A power recliner gives more in-between positions.
Higher-end models may also include power headrests and power lumbar support, which can improve neck and lower-back comfort significantly.
Manual recliner comfort advantages
A manual recliner can still be extremely comfortable. In fact, many people love the simpler, more natural reclining motion of a manual chair. If the chair fits your body well, comfort can be excellent even without power features.
Manual recliners also appeal to people who prefer a traditional recliner feel and do not care about tiny position adjustments.
Which is more comfortable overall?
If your idea of comfort includes customizable positioning, power usually wins. If your idea of comfort is more about cushions, seat fit, and simple relaxation, a manual recliner may feel just as good.
Ease of Use Comparison
This is one of the biggest differences between the two.
A power recliner is much easier to use for people with arthritis, joint pain, back issues, reduced strength, or mobility limitations. With the press of a button, the footrest rises and the chair reclines gradually. You do not need to yank a handle or push back with your body.
A manual recliner requires more effort. Some are smooth and easy to use, but others may feel stiff depending on the model, the user’s size, and the chair’s condition. For healthy users, that may not be a problem. For older adults or anyone with limited strength, it can matter a lot.
If you are comparing accessibility or maintenance concerns, it may also help to read the site’s guide on common Lazyboy recliners problems, solutions and parts list to understand the kinds of issues owners typically run into over time.

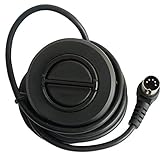
Power Recliner Power Supply, Sopito 2-Pin AC/DC Adapter 100-240V 50/60hz

Power Recliner Power Supply, AC/DC Switching Power Supply Transformer 2-pin 29V/24V 2A Adapter with AC Power Cord for Electric Power Recliner Lift Chair

Universal Electric Couch Power Recliner Adapter 29V 2A Power
Price Comparison
In general, manual Lazyboy recliners are more affordable than power models. That price difference comes from the extra motorized components, electronics, wiring, and convenience features included in a power recliner.
If you are shopping on a tighter budget, manual often gives you better value upfront. You can still get Lazyboy comfort and style without paying for powered features you may not need.
If you are comfortable spending more for convenience, easier operation, and extra comfort adjustments, a power recliner may justify the higher cost.
Durability and Long-Term Reliability
Manual recliner durability
Manual recliners are often viewed as simpler and therefore less likely to have electrical failures. That does not mean they never break, but they usually rely on mechanical parts such as handles, cables, springs, and linkages.
Because there are fewer electronic components, some buyers see manual recliners as the safer choice for long-term simplicity.
Power recliner durability
Power recliners can also last a long time, but they introduce more parts that can eventually fail, including motors, transformers, control boxes, switches, and connectors. That does not automatically make them unreliable. It just means there are more possible failure points over the life of the chair.
If you want to understand common repair items, browsing a recliner power switch or a recliner power supply transformer can help you see the kinds of components power chairs may eventually need.
Repair and Maintenance Comparison
Manual recliner repairs
Manual recliner repairs are often more straightforward. Common issues include broken handles, snapped release cables, worn tension springs, or footrest mechanism problems. Many of these repairs are simple enough for handy owners to attempt at home.
Typical items people compare include a recliner handle replacement, a recliner replacement cable, or a recliner tension spring when troubleshooting a manual chair.
Power recliner repairs
Power recliner repairs can be easy in some cases, but they can also be more technical. A problem might involve a faulty switch, loose power connection, bad transformer, damaged motor, or hand control failure.
Sometimes the fix is simple. Other times it requires more careful diagnosis than a manual recliner would.
Which one is easier to maintain?
Manual recliners usually win for simplicity. Power recliners win for convenience, but not usually for ease of repair.
Power Outage and Outlet Considerations
A manual recliner works whether or not the electricity is on. That may not sound like a big factor at first, but some buyers like knowing their chair is fully usable at all times without depending on an outlet.
A power recliner needs electricity. You will need a nearby outlet, and the chair’s placement may be affected by cord routing. During a power outage, some power recliners may remain in their current position unless they include a battery backup system.
If you want cable management around a powered chair, it can help to browse cord cover for floor solutions or a surge protector power strip for safer power setup.
Room Placement and Space Planning
Both manual and power recliners need room, but the way they operate can affect placement.
Some manual recliners need body momentum and more natural movement when reclining. Some power recliners move more gradually and precisely, which can feel easier in tighter layouts. Still, what matters most is the actual clearance measurement for the specific model.
If you are trying to choose the right chair for your room, a tape measure is essential, and some buyers also compare wall hugger recliner options when space is limited.
Who Should Choose a Power Lazyboy Recliner?
A power recliner is often the better choice if:
- You want easy, button-based operation
- You have arthritis, back pain, or limited mobility
- You want more precise reclining positions
- You like premium features such as USB charging, headrest control, or lumbar adjustment
- You do not mind paying more for added convenience
Power recliners are especially appealing if comfort customization matters more to you than mechanical simplicity.
Who Should Choose a Manual Lazyboy Recliner?
A manual recliner is often the better choice if:
- You want a lower purchase price
- You prefer a simpler chair with fewer electronic components
- You do not mind using a handle or body pressure to recline
- You want something easier to troubleshoot mechanically
- You do not want to depend on a nearby power outlet
Manual recliners are often the better fit for buyers who value simplicity, lower cost, and traditional operation.

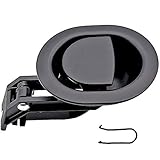
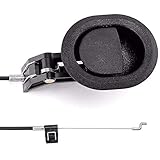
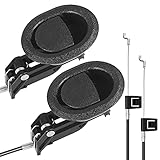
ttmagic Metal Recliner Handle Replacement Parts with Cable, Universal Recliner Sofa Chair Couch Release Lever Pull Handle, Fits Ashley and Major Recliner Brands, Exposed Cable Length 4.9“
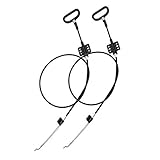
2 Pieces Recliner Release Cable Replacement D-Ring Pull Handle, Exposed Length 4.75" with S Tip

Baridwon 2 Set Recliner Replacement Parts, Durable Recliner Release Pull Handle with Recliner Pull Cable, Repair Replacement Parts Compatible with Most Furniture of Recliner Chair Sofa Couch
Power vs Manual Recliner for Seniors
For many seniors, power recliners have a clear advantage because they require less effort to operate. Pressing a button is easier than forcing a chair backward or closing a footrest with leg pressure. If standing up and sitting down are becoming more difficult, a powered option may be more comfortable overall.
That said, some seniors still prefer manual recliners because they are familiar, simple, and do not rely on electricity. The better choice depends on the person’s strength, mobility, and preferences.
Power vs Manual Recliner for Families With Kids or Heavy Daily Use
If the chair will be used constantly by multiple people, manual recliners can be appealing because they are simple and less complicated electronically. But they may also experience more wear on handles, cables, and release parts if used roughly.
Power recliners can feel smoother in daily use, but the controls should be treated carefully and the chair needs power access. Families should think about how the chair will realistically be used, not just how it feels in the showroom.
Which One Feels More Premium?
Power recliners usually feel more premium because of the smoother motion, added controls, and convenience features. They often feel more modern and more customizable.
Manual recliners can still feel luxurious in terms of cushioning, upholstery, and support, but their operation feels more traditional than high-tech.
Final Verdict: Is Lazyboy Power or Manual Better?
Neither option is automatically better for everyone.
A Lazyboy power recliner is usually better if you want convenience, easier operation, more precise comfort adjustment, and premium features. A Lazyboy manual recliner is usually better if you want a lower price, simpler ownership, no power dependence, and easier mechanical troubleshooting.
If comfort control and ease of use are your top priorities, power is often worth it. If simplicity and value matter more, manual is often the smarter buy.
The best way to choose is to think about how you actually relax at home. Do you want to press a button and fine-tune the position exactly? Or do you prefer a straightforward recliner with fewer parts and a lower price tag? Once you answer that honestly, the better choice becomes much clearer.
If you are still comparing repair and maintenance concerns, it can also help to look at common items like a recliner handle replacement, recliner replacement cable, recliner power switch, and recliner power supply transformer so you understand the common parts involved with each type.
How to Replace a Lazyboy Seat Cushion
Lazyboy is perhaps one of the comfiest armchairs out there, and it is no surprise that so many people love them. With their plush cushions, supportive design, and soft seating feel, Lazyboy chairs are made for everyday comfort. Whether you are watching TV, reading a book, relaxing after work, or playing your favorite video games, a good Lazyboy armchair can easily become the most used seat in the house.
However, with regular use over time, the Lazyboy seat cushion can start to wear out. The cushion may flatten, sag, lose support, or simply stop feeling as comfortable as it once did. When that happens, the chair may still be in good condition overall, but the seating comfort can drop noticeably. The good news is that replacing a Lazyboy seat cushion is usually not a complicated process. In many cases, it can be done fairly quickly at home, as long as you make sure you get the right replacement cushion for your specific Lazyboy model.
Before starting, it is also a good idea to inspect the cushion carefully and confirm whether the problem is really the cushion itself or if related parts such as the foam, support springs, or seat foundation may also be worn. If the chair is older, you may also want to compare related items like recliner seat cushion replacement, upholstery foam for cushions, or even a recliner repair kit if you suspect more than one part may need attention.
Here are six steps that will help you easily replace a Lazyboy seat cushion in no time:
Step 1
First of all, you have to find the information tag on your Lazyboy. This is one of the most important parts of the process because the information tag helps identify the exact chair model and the parts associated with it. Sometimes the replacement of the cushion may be under a Lazyboy warranty cover, so make sure you check it carefully before taking any further steps. If your chair is still under warranty, you may be able to get the cushion replaced at a lower cost or even at no cost depending on the terms.
It is also smart to take a clear photo of the tag and write down the model information before contacting anyone. That can save time later when ordering parts or asking about compatibility.
Step 2
Once you have the information tag, contact the Lazyboy warranty department or the dealer where the chair was purchased and let them know the details shown on the tag. They should be able to tell you whether your cushion replacement is covered under warranty and what your next steps should be.
If the cushion is covered, you may be able to order a new one directly through the appropriate channel. If it is not covered, then you will need to purchase a replacement cushion yourself. In either case, it is best to make sure the replacement is an original Lazyboy cushion or a properly matched replacement designed for your exact chair. This helps reduce the chances of sizing issues, poor fit, uneven appearance, or comfort problems once the new cushion is installed.
If you are comparing alternatives or looking for comfort-related accessories while waiting for the replacement, you may also want to browse chair seat cushion options or lumbar support pillow for recliner use for temporary comfort improvement.
Step 3
Once you get your new cushion, check the information tag and compare it carefully with the replacement cushion so you can correctly match the cushion to your armchair. Do not skip this step. Even if the cushion looks similar at first glance, small differences in size, thickness, attachment style, or shape can affect how well it fits and how comfortable the chair feels after installation.
Before removing anything, gather the tools you may need and inspect how the original cushion is attached. Depending on the chair design, you may need a screwdriver and some patience to remove parts carefully without damaging clips, brackets, or upholstery. If you want to make the job easier, it can help to have a screwdriver set, a flashlight for home repair, and work gloves nearby.
Step 4
It is time to remove the worn-out cushion. Take it out of the armchair carefully and avoid forcing any part loose too quickly. Use a screwdriver if needed, and make sure you remove each part carefully without breaking anything. If the old cushion is attached tightly, check for hidden fasteners, clips, or locking points before pulling harder.
Once the old cushion has been removed, clean the area underneath before installing the new one. Dust, loose fabric debris, or old foam particles can build up over time and affect how the new cushion sits. This is also a good time to inspect the chair frame and support area underneath the cushion. If the base support looks worn, you may want to check related items such as recliner springs or upholstery webbing if the seat foundation seems weak.
After cleaning and inspecting, slide the new cushion into place carefully. Make sure it sits evenly and aligns with the frame and surrounding upholstery.
Step 5
If your Lazyboy model includes a back cushion that also needs removal or adjustment during the process, find the cushion’s release levers on each side at the back of the recliner. Push the levers upward so they release the back cushion. Then remove the cushion carefully and set it aside safely.
This step is important because on many recliner models, the rear cushion or chair back may need to be loosened or removed to allow proper access and alignment when replacing the seat cushion. Be gentle and avoid twisting the back cushion or forcing it out at an angle.
Step 6
The final step requires you to reinstall or replace the back cushion if it was removed. Lift the back cushion into position and push it down carefully until you hear the release levers click into place. That click tells you the cushion is properly locked in.
Once everything is back in position, test the chair before regular use. Sit down, shift your weight slightly, and make sure the new cushion feels stable, even, and properly fitted. If the cushion feels loose, uneven, or too tight, check the fit again before assuming the installation is complete.
If the step by step instructions above are not clear enough, here is a video showing how to replace a seat cushion:
Replacing a cushion in your favorite Lazyboy armchair is usually a fairly easy process and something many owners can do at home by themselves, without spending extra money taking your Lazyboy to a local repair store. The most important things are choosing the right replacement cushion, checking the chair’s information tag carefully, and handling each part gently during removal and installation.
Frequently Asked Questions
How do I know if my Lazyboy seat cushion needs replacement?
If your seat cushion feels flat, saggy, uneven, lumpy, or no longer gives you the same comfort and support it used to, it may be time for a replacement. In some cases, the fabric still looks fine but the inner foam has already worn down.
Can I replace just the seat cushion and not the whole chair?
Yes, in many cases you can replace just the seat cushion. If the rest of the chair is still in good condition, replacing the cushion can restore comfort without the cost of replacing the entire Lazyboy.
Should I buy an original Lazyboy cushion or an aftermarket replacement?
An original Lazyboy cushion is usually the safest choice because it is more likely to match the size, shape, and support of your chair correctly. An aftermarket replacement may work, but you should compare measurements carefully before buying.
Can I replace the foam inside the cushion instead of replacing the whole cushion?
Sometimes yes. If the cushion cover is still in good condition, some owners choose to replace only the foam insert. In that case, comparing upholstery foam for cushions may be useful, but you still need to match the thickness and density correctly.
What tools do I need to replace a Lazyboy seat cushion?
The exact tools depend on the chair model, but a screwdriver, flashlight, and gloves are often enough for simple cushion replacement. Some models may require a little more care if clips or release levers are involved.
Can a worn seat cushion mean there is another problem underneath?
Yes. Sometimes the cushion is not the only worn part. Recliner springs, webbing, support boards, or the seat base underneath may also be worn. That is why it is smart to inspect the chair once the old cushion is removed.
Is replacing a Lazyboy seat cushion difficult?
Usually no. For many people, it is a manageable home repair as long as they have the correct replacement cushion and follow the steps carefully. The key is to avoid forcing parts and to make sure the replacement matches the chair properly.
How long does it take to replace a Lazyboy seat cushion?
If the correct replacement cushion is already on hand, the process can often be done fairly quickly. For many chairs, it may only take a short amount of time, especially if there are no stuck parts or hidden fasteners.
Can I use a temporary cushion while waiting for the replacement?
Yes. While waiting, some people use a chair seat cushion or a lumbar support pillow for recliner use to improve comfort temporarily.
What should I do if the new cushion does not fit correctly?
Stop and compare the information tag, measurements, and attachment style again before forcing it into place. A poor fit may mean the replacement is not correct for your exact model. In that case, contact the seller or Lazyboy support before continuing.
Summary
If you follow the steps above carefully, your chair can feel comfortable and supportive again without a full replacement. And if you still have questions, you can always contact the Lazyboy department for more information, especially if you are unsure about warranty coverage, model compatibility, or whether your chair may need more than just a new cushion.
How to Adjust Lazyboy Recliner Tension
Find it a little too difficult to push back or pull the lever of your Lazyboy recliner? Or does it recline too easily, lean too far back, or feel like it is not giving you enough support? One of the most useful features of many Lazyboy recliners is that they allow tension adjustment. This means you can fine-tune the reclining mechanism so the chair matches your size, body weight, strength, and personal comfort preference.
This is important because not every user will want the same reclining feel. If you are on the petite side, you may prefer to reduce the tension so it takes less effort to push the chair back and recline comfortably. On the other hand, if you are heavier or simply prefer a firmer reclining action, increasing the tension can help the chair feel more supportive and prevent it from leaning back too easily. A properly adjusted recliner usually feels smoother, more balanced, and more comfortable for everyday sitting, reading, watching TV, or napping.
In many cases, recliner tension problems are not caused by a major defect at all. Sometimes the chair simply needs a quick adjustment underneath. Other times, worn hardware or a weak spring may be part of the problem. Before assuming your recliner is damaged, it is worth checking the tension setting and making sure everything is adjusted correctly.
Why recliner tension matters
Recliner tension affects how easily the chair moves when you lean back and how much resistance the reclining mechanism gives you. If the tension is too loose, the chair may feel like it drops back too quickly or leans farther than you want. If the tension is too tight, it may become hard to recline at all, especially for smaller or lighter users. The right setting helps the recliner feel controlled, supportive, and more comfortable over long periods of use.
Common signs your recliner tension needs adjusting
There are a few common signs that usually tell you your Lazyboy recliner needs a tension adjustment. These include:
- The chair is too hard to recline
- The chair leans back too easily
- The reclining action feels uneven
- One side feels tighter than the other
- The chair no longer feels as supportive as it used to
- You recently moved, repaired, or heavily used the recliner and it now feels different
If you notice one or more of these problems, checking the tension adjustment is a smart first step before replacing any parts.
Feed don’t touch floor or leans too far back?
This is a common problem and has been asked a lot. So we wrote a dedicated article to solve this issue. You can view the article HERE.
How do you adjust the recliner tension?
Lazyboy recliners are typically equipped with either a pair of wing nuts or thumb wheels that allow you to adjust the reclining mechanism tension. To begin, make sure the leg rest is fully closed, then carefully tilt the recliner chair forward so you can access the underside. Depending on the model, you may find wing nuts or thumb wheels underneath the chair, either toward the back or closer to the center of the mechanism.
Some Lazyboy models use wing nuts, such as certain Reclina-Rocker and Reclina-Way chairs, while others use thumb wheels, such as some Reclina-Glider Swivel models. Even though the hardware may look a little different, both styles are adjusted in basically the same way.
How to increase tension
To increase reclining tension, turn both thumb wheels or wing nuts clockwise by one quarter turn. This makes the recliner harder to push back and can help if the chair feels too loose or leans back too far for comfort.
How to decrease tension
To decrease tension, turn both sides counter-clockwise by one quarter turn. This makes the chair easier to recline, which may be more comfortable for lighter users or anyone who finds the recliner too stiff.
Adjust both sides equally
It is very important to adjust both sides equally. If one side is tighter than the other, the recliner may feel uneven, twist slightly during movement, or wear out faster over time. After adjusting both sides by one quarter turn, return the recliner to its upright position and test it. Sit down, lean back, and see how the reclining action feels. If further adjustment is needed, repeat the process in small quarter-turn increments until you find the setting that feels right.
What you may need before adjusting
If the mechanism feels dry or stiff while you are making adjustments, it may help to inspect the moving parts and consider using a silicone spray lubricant for recliner parts. If you want to check the hardware more closely, having a flashlight for home repair and a pair of work gloves nearby can make the job easier and safer.
If the adjustment points are hard to reach, a adjustable wrench or needle nose pliers may also be useful depending on your chair model.
Important rule when adjusting recliner tension
When adjusting recliner tension, there is one very important rule: never loosen or tighten the thumb wheels or wing nuts all the way. Doing this can damage the tension spring or place too much stress on the mechanism. After making adjustments, check to make sure the spring does not move on the bolt. If it does, turn the thumb wheel or wing nut clockwise by at least another half turn until the spring no longer moves loosely on the bolt.
At the same time, the spring should not be fully compressed after adjustment. If the spring looks completely pressed down, loosen the thumb wheels or wing nuts slightly by turning them counter-clockwise by at least half a turn. The goal is to find a balanced setting where the mechanism feels secure, smooth, and comfortable without over-stressing the spring.
Tips for testing the new tension setting
After every adjustment, test the recliner before making another change. Sit in the chair the way you normally use it. Recline slowly, return to upright, and pay attention to whether the chair feels more natural. Small adjustments usually work better than large ones. It is better to fine-tune the tension gradually than to overcorrect it in one attempt.
Can body size affect the right tension setting?
Yes, absolutely. The best recliner tension setting often depends on the user. A lighter person may find a factory-tight setting difficult to use, while a heavier person may feel under-supported if the tension is too loose. That is why Lazyboy tension adjustment is such a helpful feature. It allows different users to personalize the recliner without changing major parts.
When tension adjustment is not enough
Sometimes the problem is not just the setting. If the chair still feels too loose, too stiff, noisy, or unstable after proper adjustment, the real problem may be a worn tension spring, stretched hardware, damaged mechanism, or another failing recliner part. In older chairs, parts naturally wear down and adjustment alone may no longer restore the original feel.
Do you need a new tension spring?
If your recliner still feels wrong even after proper adjustment, the tension spring itself may be worn, stretched, weak, or broken. In that case, adjustment alone may not solve the problem. A damaged spring can make the recliner feel too loose, too stiff, uneven, or unstable during use. If that happens, replacing the spring is often the next step.
You can easily find a recliner tension spring online, but make sure you order the correct replacement for your specific recliner model. It can also be helpful to compare recliner spring replacement options, recliner repair kit listings, and even a recliner handle replacement if your chair has multiple worn parts that may be affecting the reclining action.
Simple maintenance tips to keep tension working properly
A few simple habits can help keep your recliner tension feeling right for longer. Avoid dropping heavily into the chair, do not force the recliner backward suddenly, and inspect the underside occasionally for loose hardware or worn parts. If the mechanism looks dry or dusty, clean it carefully and use an appropriate silicone spray lubricant for recliner use. Catching small problems early can help prevent bigger repairs later.
Final thoughts
For ultimate comfort, make sure you keep your recliner tension adjusted to suit your needs. Lazyboy recliners are designed for relaxation, but they work best when the reclining mechanism matches your body and your comfort preference. A small adjustment underneath the chair can make a big difference in how easy it is to recline, how supportive the chair feels, and how enjoyable it is to use every day.
With the right tension setting for your size and build, your recliner can feel more natural, more supportive, and much more comfortable from the moment you sit down, kick your shoes off, and relax. If the chair still does not feel right after adjustment, inspect the spring and related hardware before the problem gets worse. A simple fix now can help extend the life of your recliner and keep it feeling the way it should.
OEM vs Aftermarket Lazyboy Parts: Which Is Better?
If your Lazyboy recliner, loveseat, sofa, or sectional needs repair, one of the biggest decisions you will face is whether to buy OEM parts or aftermarket parts. At first glance, the difference may seem simple. One is made for the brand, and the other is a replacement made by a third party. But once you start shopping for handles, cables, springs, motors, switches, transformers, brackets, or recliner mechanisms, the decision becomes more important.
The wrong part can waste money, create fit problems, shorten the life of the repair, or even make the furniture less safe to use. The right part can restore comfort, extend the life of your recliner, and save you from replacing the entire chair.
This guide explains what OEM and aftermarket Lazyboy parts are, how they differ, which one is usually better for specific repairs, and how to decide what makes the most sense for your budget, furniture model, and repair goals.
What OEM Lazyboy Parts Mean
OEM stands for original equipment manufacturer. In simple terms, OEM parts are original-style parts made for the furniture brand or made to the same specifications as the parts that came with the chair when it was new.
When people shop for OEM Lazyboy parts, they usually want the closest possible match to the original component in terms of size, fit, materials, mounting points, and function. This is especially important for model-specific repairs where exact compatibility matters.
OEM parts are often preferred when the furniture is still under warranty, when the repair is structural or electrical, or when the owner wants to preserve the original performance and feel of the chair.
ttmagic Metal Recliner Handle Replacement Parts with Cable, Universal Recliner Sofa Chair Couch Release Lever Pull Handle, Fits Ashley and Major Recliner Brands, Exposed Cable Length 4.9“
Baridwon Recliner Replacement Parts with Pull Handle and Release Cable (2-Sets), Repair Recliner Mechanism Parts Compatible with Most Furniture of Recliner Sofa Couch Chair
Baridwon 2 Set Recliner Replacement Parts, Durable Recliner Release Pull Handle with Recliner Pull Cable, Repair Replacement Parts Compatible with Most Furniture of Recliner Chair Sofa Couch
What Aftermarket Lazyboy Parts Mean
Aftermarket parts are replacement parts made by third-party manufacturers rather than the original furniture brand. These parts are often designed to fit multiple recliner brands or a wide range of recliner models.
In many cases, aftermarket parts are described as universal, heavy-duty, compatible, or replacement-style components. Some are very good. Some are only acceptable for simple repairs. Others may not fit properly at all.
That is why the category is broad. Aftermarket does not automatically mean bad, and OEM does not automatically mean perfect for every situation. The better choice depends on the part you need and how exact the repair must be.
The Main Difference Between OEM and Aftermarket Recliner Parts
The biggest difference is precision.
OEM parts are usually chosen because they are intended to match the original furniture more closely. Aftermarket parts are usually chosen because they are easier to find, cheaper, or available in universal sizes.
The tradeoff usually comes down to these factors:
- Exact fit
- Price
- Availability
- Durability
- Ease of installation
- Risk of compatibility issues
If the part is simple and fairly standardized, aftermarket can work very well. If the part is model-specific, hidden inside the mechanism, or tied to safety and electrical function, OEM often has the advantage.
When OEM Lazyboy Parts Are Usually Better
There are situations where OEM parts are clearly the safer and smarter option.
1. When exact fit matters
Some recliner parts need to line up precisely with brackets, bolt holes, cable lengths, lever positions, or motor connectors. If the part is even slightly off, the recliner may not open properly, close correctly, or feel right during use.
This is especially true for model-specific recliner mechanisms, brackets, and powered components.
2. When the recliner is still under warranty
If your chair is still covered under a store or manufacturer warranty, using a non-original part may complicate future service. In that situation, sticking to OEM-style replacement parts is usually the safer decision.
3. When the repair involves power components
Motors, transformers, control boxes, power switches, and electrical connectors are areas where compatibility matters more. Even if an aftermarket part looks similar, connector type, voltage, mounting layout, or wiring may differ.
If you are troubleshooting powered components, it can still help to browse comparable products like a recliner power supply transformer or a recliner power switch so you understand the different styles and connector types before buying.
4. When comfort and original feel matter
Some parts affect more than simple function. They affect how the recliner feels during everyday use. An OEM-style tension spring, release assembly, or mechanism may preserve the original motion and support more accurately than a generic substitute.
When Aftermarket Lazyboy Parts Can Be a Good Choice
Aftermarket parts can be a very practical option in the right situations.
1. When the part is simple and standardized
Some recliner parts are common across many brands. This includes many release handles, cables, springs, and some switches. In these cases, a properly measured aftermarket replacement can work just as well as the original.
For example, many people successfully repair a broken handle or snapped release cable using a recliner handle replacement or a recliner replacement cable without needing an exact brand-specific part.
2. When OEM parts are hard to find
Older recliners often become difficult to repair because exact original parts may be discontinued, backordered, or unavailable locally. In that case, a high-quality aftermarket replacement may be the only realistic option.
3. When budget matters
Aftermarket parts are often less expensive than OEM parts. If the chair is older and you simply want to restore usable function without spending too much, aftermarket can make good financial sense.
4. When you want a heavy-duty replacement
Some aftermarket manufacturers advertise stronger materials, reinforced metal components, or universal heavy-duty construction. While quality varies, some aftermarket parts are actually more robust than the original part they replace.
ttmagic Metal Recliner Handle Replacement Parts with Cable, Universal Recliner Sofa Chair Couch Release Lever Pull Handle, Fits Ashley and Major Recliner Brands, Exposed Cable Length 4.9“
2 Pieces Recliner Release Cable Replacement D-Ring Pull Handle, Exposed Length 4.75" with S Tip
Baridwon 2 Set Recliner Replacement Parts, Durable Recliner Release Pull Handle with Recliner Pull Cable, Repair Replacement Parts Compatible with Most Furniture of Recliner Chair Sofa Couch
OEM vs Aftermarket Lazyboy Parts: Side-by-Side Comparison
| Factor | OEM Parts | Aftermarket Parts |
|---|---|---|
| Fit | Usually closer to exact original fit | Can vary from exact to universal |
| Price | Usually higher | Usually lower |
| Availability | Can be limited for older models | Often easier to find online |
| Installation | Often easier if truly model-matched | May require measuring and adjustment |
| Durability | Often dependable and consistent | Ranges from poor to excellent |
| Electrical compatibility | Usually safer for powered furniture | Needs careful checking |
| Best use case | Complex, model-specific, or warranty repairs | Simple, common, or budget-friendly repairs |
Which Lazyboy Parts Are Usually Safe to Buy Aftermarket?
In many cases, the following parts are commonly available in aftermarket form and can work well if the measurements and connector styles match:
- Release handles
- Release cables
- Tension springs
- Some universal power switches
- Some transformer or adapter replacements with matching specs
- Plastic hand controls for certain standard motion systems
That does not mean every universal part will fit every chair. It means these categories are more likely to have workable replacements compared to highly model-specific structural hardware.
If you are comparing repair items, it may help to look at recliner spring replacement options or a recliner remote hand control to see how much variation exists between connector styles and button layouts.
Which Lazyboy Parts Are Better to Buy OEM?
These parts are usually better sourced as OEM or as near-OEM replacements whenever possible:
- Complete recliner mechanisms
- Metal brackets with exact bolt patterns
- Model-specific seat or back locking hardware
- Power components with uncommon connectors
- Parts tied to lift systems or advanced motion features
- Components needed for warranty-covered repairs
If the wrong part could affect safety, alignment, stability, or electrical performance, OEM usually gives you a better margin of confidence.
How to Decide Which One Is Better for Your Repair
The easiest way to make the right choice is to ask a few practical questions.
Is the part simple or complex?
A simple handle or cable often has more replacement flexibility. A complex mechanism or powered component usually needs tighter compatibility.
Do you have the exact model information?
The more model details you have, the easier it is to compare OEM and aftermarket choices accurately. Your recliner’s identification tag can help you find the correct replacement dimensions or part style.
How old is the furniture?
If the chair is older and already out of warranty, aftermarket may make more sense financially. If it is newer or still premium in value, OEM may be worth the extra cost.
Are you repairing for long-term use or short-term function?
If you want the chair to feel as close as possible to original condition, OEM is often worth considering. If you just need to get the chair working again affordably, aftermarket can be a smart choice.
How to Avoid Buying the Wrong Replacement Part
Whether you choose OEM or aftermarket, the biggest mistake is buying based on appearance alone.
Before ordering, always check:
- Part length and width
- Connector type
- Bolt hole spacing
- Cable exposed length
- Voltage and amperage for powered parts
- Left-side vs right-side installation
- Manual vs power compatibility
Using a tape measure and taking close-up photos of the old part before removal can prevent a lot of frustration.
What About Quality? Are Aftermarket Parts Less Durable?
Not always. This depends entirely on the specific manufacturer and part type.
Some aftermarket parts are cheaply made and intended only as low-cost temporary replacements. Others are well-made, reinforced, and perform very well. The problem is that quality varies more in the aftermarket world than it usually does with OEM-style parts.
That is why reviews, measurements, materials, and photos matter. If an aftermarket part has strong fit feedback, solid metal construction, and dimensions that match your original part, it may work perfectly well.
If you are comparing basic repair items, browsing categories like heavy duty recliner handle can help you spot whether sellers are offering upgraded materials or just generic low-cost substitutes.
Are OEM Parts Always Worth the Extra Cost?
Not always.
If you are replacing a simple release handle on an older chair, paying a premium for OEM may not be necessary. But if you are replacing a motor, mechanism, lift component, or anything tied to exact fit and performance, the extra cost may be worth it.
The real question is not whether OEM is always better. The real question is whether the specific repair benefits from exact compatibility more than it benefits from lower cost.
Best Strategy for Most Lazyboy Owners
For many repairs, the smartest approach is mixed rather than all-or-nothing.
Use OEM or near-OEM parts for:
- Power systems
- Major structural hardware
- Lift chair components
- Anything with difficult alignment
Use high-quality aftermarket parts for:
- Handles
- Cables
- Springs
- Simple external replacement items
That balance often gives you the best mix of cost savings, availability, and repair success.

Oval 2 Button 5 Pin Power Recliner Electric Sofa Switch Hand Control
Power Recliner Power Supply, Sopito 2-Pin AC/DC Adapter 100-240V 50/60hz
Fromann Recliner Switching 2 Button 5 Pin Round Hand Control Handset
When You Should Skip the Repair Entirely
Sometimes the question is not OEM versus aftermarket. Sometimes the real question is whether the chair is worth repairing at all.
You may want to reconsider the repair if:
- Multiple major parts have failed at the same time
- The frame is cracked or unstable
- The upholstery, padding, and mechanism are all heavily worn
- The cost of correct parts is approaching replacement value
In that case, putting money into even the right part may not be the best long-term decision.
Final Verdict: OEM vs Aftermarket Lazyboy Parts
So, which is better?
OEM Lazyboy parts are usually better when you need exact fit, original performance, power compatibility, warranty-safe repairs, or model-specific hardware. Aftermarket Lazyboy parts are often better when the repair is simple, the part is standardized, the original part is hard to find, or you want a more affordable solution.
For many owners, aftermarket is perfectly fine for common repairs like handles, cables, and some springs. For structural, electrical, or high-precision repairs, OEM is usually the safer choice.
The best decision comes down to the part itself, not just the label. Measure carefully, compare connector styles, check your chair model, and think about whether the repair needs exact compatibility or just reliable function.
If you are starting your search, compare options like a recliner handle replacement, a recliner replacement cable, a recliner spring replacement, or a recliner power switch and match the measurements and specs as closely as possible.